As I mentioned in a previous post, each manufacturing cell at the GE Aviation 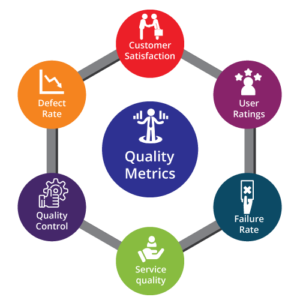 Rotating parts facility has a three-part leadership team which includes a production supervisor who oversees the flow of operations and materials, a process engineer who works directly with the machine operators and the production supervisor to streamline the manufacturing operations and ensure the efficiency of the operations, and a quality engineer who oversees and manages the quality assurance process during the manufacturing operations.
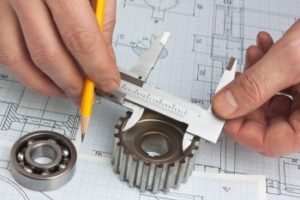 The quality engineering operation is far from simple. Each cell is responsible for multiple parts and operations, and data is collected throughout the process to help track and fix any problems that may be emerging. The parts being manufactured in the plant go through up to 25 operations, and at each point, any small error can lead to a defect. In addition, the parts have complex cutting and milling operations that can contribute to accumulated stresses, and error tolerances can be very tight, less than 1/1000 of an inch in most cases. Finding where an error is happening, why, and how it is happening is not guesswork, it is an extremely detailed process that includes thousands of data points collected by the machines and operators throughout the process.
At GE Aviation quality engineering has multiple parts. I was able to spend part of 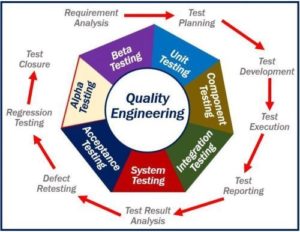 a day with Jon who oversees the quality lab. In the quality lab, the technicians are using a variety of techniques to essentially double check the data collected by the operators. Obviously, they cannot collect and analyze each and every part leaving the factory, so they do a statistical sampling and compare the values collected to what is being recorded in the internal QA database. I think my students would absolutely be fascinated with the lab because unlike the factory floor they have operational Programmable Logic Controllers or modified robotic arms that are testing tolerances on the parts in an automated fashion. The whole process has a very state of the art feel. At the same time, technicians are using a very analog process of placing a dental epoxy in certain small locations in the part to create a mold that can then be measured with digital and analog tools. Due to the high reflectivity of the metals used in the parts some state of the art measuring devices that depend on lasers and ultrasound are not as reliable as is needed in this very specific environment. It is an interesting combination of older and brand new technologies. It also has a very real outcome, as these parts are heading for engines that power the planes that fly all over our planet. A slip in quality is just not acceptable.
Where true quality engineering work happens in the Rotating Parts facility is in the manufacturing operations themselves. I was able to shadow John, and his assistant Ahmed, who is working at GE Aviation on a co-op from the University of Maryland. John was kind enough to really involve me in the work process he and Ahmed were involved in trying to isolate some quality issues they were having on a specific part. They were in the process of collecting data about Non-Conforming Reports (NCR’s) which had been issued to the internal QA software, and evaluating the nature, timing, and severity of the NCR. John is a brilliant engineer who has years of experience in quality management. He went through a variety of problem-solving techniques he has used in his career. For this particular problem, we discussed the DMAIC process which is part of six sigma. 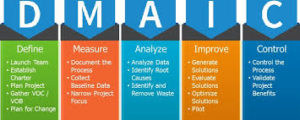 DMAIC is an acronym for Define, Measure, Analyze, Improve, Control. One method of starting the “define portion of DMAIC is to use a fishbone diagram. A fishbone diagram is also called a cause and effect diagram or Ishikawa diagram and is a visualization tool for categorizing the potential causes
 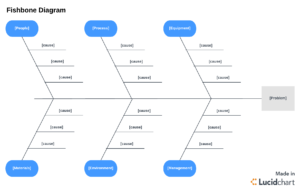 of a problem in order to identify its root causes. John continued to return to this singular idea, we need to identify the “root causes” of the problem.
He described many times when he has been on teams and the principal engineers did not use a systematic approach, and in trying to determine what is changing an outcome they took a scattershot approach and identified a list of potential problems. He was clear that if you do not use a scientific approach driven by hypothesis testing and strong data analysis you may never identify the “true root cause”. John pointed out that often we will have a “gut feeling” based on experience and prior knowledge, and it may be fastest to follow that feeling, but without data analysis, we can waste a lot of time, resources, and money.
Define is the first step, and many of us stop right there when problem-solving. Measurement is so crucial to the success of a change process. Without good measurement there can be no real analysis, we will not know if the improvement is real and sustainable, and we cannot control for other variables in the process. I have more to write about what I learned from John and Ahmed, but I want to get down one more idea for today. John taught me about Jidoka. The concept of Jidoka is one of the two pillars of the Toyota Production System along with just-in-time. Jidoka highlights the causes of problems because work stops immediately when a problem first occurs. This leads to improvements in the processes that build in quality by eliminating the root causes of defects. John stressed how important it is that an error or problem not be allowed to continue because we don’t want to stop the process. Even though a stoppage costs time and money, letting the error continue may ultimately cost more. It feels like we fall into this trap in our classrooms. We can’t just stop, but we have to figure out ways to really use DMAIC and reset our process rather than letting negative ideas and processes grow in our classrooms.