Students will utilize Google Maps to engage in scientific learning. (Extension: Students will increase cultural understanding and literacy)
| Author | Grade Level | Content Area |
| Emily Lahr | 9-12 | Science |
- Making Connections
- Background
- Materials
- Activity: Part 1 - The Task
- Activity: Part 2 - Student Investigation
- Activity: Part 3 - Gallery Walk and Mini-Presentations
- Activity: Part 4 - Submission
- Wrap Up and Action
- Extensions
- Resources
- About the Author
- About the Fellowship
- Print this lesson
Making Connections
Google Maps and map development is not only a 21st-century skill but also provides a method of interdisciplinary connections for students, content, and the real world. This lesson can be used in several ways.
Background
Utilizing Google Maps can allow for a deeper connection to content and the world beyond the local area. Use this lesson plan to allow students to travel virtually while still learning material about the topographic features of Earth, and Earth’s natural landmarks, or as an extension activity to create cultural awareness of unique locations.
Materials
- Internet access
- Computer/Chromebook/Personal Computer/iPad
- Google login or ability to make a login
- Google Maps application or browser
Activity: Part 1 - The Task
Determine how you would like to use the activity:
This can be used for scientific focus or extended for a cultural emphasis or travel map
- Example Use: Science
- Mapping volcanoes (specific types or locations)
- Example Volcanoes: Shield Volcanoes (Kilauea, Newberry Volcano, Piton de la Fournaise), Composite Volcanoes (Mount Saint Helens, Mount Vesuvius, Mount Etna), and Cinder Cone Volcanoes (Parícutin, Wizard Island, Lava Butte)
(Note: There are hundreds of named volcanoes on Earth. It is recommended for the teacher to select a few volcanoes for each class group [ex. 3 composite volcanoes, 3 shield volcanoes and 3 cinder cone volcanoes] this way several volcanoes are covered offering a deeper knowledge of the content for students.)
Determine how many points on the map you would like and the time for students to work:
- Recommendations of Points vs. Time:
- 3-5 points: 30 minutes
- 5-10 points: 45-60 minutes
- 10+ points: 60+ minutes
Note: Keep in mind that younger students will typically work slower than older students and each class is different. Feel free to adjust point count and time as needed.
Assign groups of no more than two individuals.
Activity: Part 2 - Student Investigation
Student Task Sheet: Provide students with the handout “Google Maps Activity” and specify what task they are working on.
- Adding layers/points to Map: Students should first go to the website google.com/mymaps and log in to the account they would like to use to house their map. Students can then use the search bar to search for their assigned locations. Once the location has been searched, the point can be added onto the map by selecting “+ Add to Map”. Be sure that the students use “Layers” to organize their added points. These layers can be turned on and off by clicking the checkbox near their name. A layer should be used for each grouping of items. For each group of volcanoes researched there should be one layer, in this activity there will only be three layers to the map. Use the “Student Map Design Sheet” for additional information and tool navigation.
Note: Google Maps only allows 10 layers but that does not include the number of points in each layer. Have students only use one layer per category when creating their maps so that they do not run out of layers, should you choose to have students create a larger map.
Activity: Part 3 - Gallery Walk and Mini-Presentations
Presentations: Depending on the time constraints, students can do a verbal presentation about their project. (Note: It is best practice to allow the students to present with their technology [ipad, chromebook, etc.] so that the visiting group can investigate the group map.)
- Suggested Verbal Presentation Requirements: What was the assignment done? What sites were assigned or selected? What interesting information did you learn from your research? When you completed the ‘street view’, what did you notice about your location? Why are these pieces important?
Gallery Walk: A technique to engage students within small groups by allowing them to share ideas and respond to prompts with their peers and group members.
- How does it work? Gallery walks are done post-project so that students can hone skills in presenting and providing feedback to their peers.
- What does it look like? After the activity is completed, students are asked to find a place around the classroom or area with their project or presentation. Half of the group should remain at the presentation area to present while the other half of the group should walk to other groups and listen to the presentations. (Note: Both students will have a chance to travel to all groups but both also need to present. If there are time constraints, only allow each student to go to a certain number of groups.)
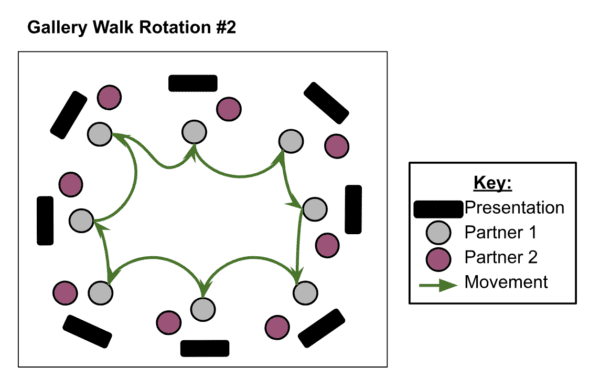
See Gallery Walk Rotation #1 & Gallery Walk Rotation #2 for information on what the gallery walk might look like in the classroom.

- How much time do students need? Allot approximately 5 to 7 minutes for presentations and travel time depending on the number of points required. (Note: Feel free to adjust the time based on student or class needs)
- What do students need to do while rotating? Allow the students to travel to each group for the allotted time and have the students respond to the presentations in a “I like…… OR I wonder…..” sentence structure. This allows students to provide positive and constructive feedback.
- It is also suggested that students take notes while listening to presentations either in a notebook or on a worksheet. An example of what the students should be taking note of can be found on “Gallery Walk Example”
- What does the teacher do while students rotate? While students are rotating, monitor groups for conversations and interactions. Keep students focused and productive. Make sure students are reflecting and taking notes at each group.
- (Suggested) After the Gallery Walk: Bring students back together for a whole class discussion about their takeaways. For example, what did the students learn from other groups? What was interesting? What would students modify about their map if they were to do this again?
(Note: This is only one example of how to complete a gallery walk. There are several other ways to complete this and they can be found through internet searches. Feel free to apply the most appropriate gallery walk to your class.)
Activity: Part 4 - Submission
This will vary based on your LMS (Learning Management System) or submission preference. An exemplar map might look like this: Google Maps Exemplar
Wrap Up and Action
Suggested: Use the rubric provided to grade students from a Met or Not Met focus.
MAP DEVELOPMENT AND PRESENTATION RUBRIC
| Criteria | Met/Not Met |
| Student remained on task and turned in the assignment on time. | Met OR Not Met |
| Student identified the appropriate number of points for the task provided. | Met OR Not Met |
| Student utilized their knowledge of the locations provided on the map to provide a quality explanation of why the locations were chosen. | Met OR Not Met |
| The student used the Google Maps application (browser or application) to create their project. | Met OR Not Met |
Grading
4 Met – 100
3 Met – 89
2 Met – 79
1 Met – 69
0 Met – 59
Extensions
Use this activity to engage students in cultural or brain-break-based
maps to emphasize different aspects of the interdisciplinary connections or provide a unique activity for students to learn about each other and themselves!
- Culture
- Mapping landmarks, historical locations, art, museums, etc.
- Brain Break
- Mapping wishful travel, video game locations, etc.
Task Student Instructions to be added to the Google Maps Activity Sheet if used:
If you create a Cultural or Travel based map:
- Research locations on the topic provided by your instructor.
- At each location, click the “Street View” (small yellow person) on the map and VISIT YOUR LOCATION!
- Here is how to use Street View: CLICK HERE
- When virtually visiting your location take note of this information:
- Why did you choose this location?
- What two significant cultural pieces (i.e. language, art, history, etc,) that you can see in the “Street View” area of Google Maps at this location?
If you create a Cultural or Travel based map:
- At each Demo Area or Point Labeling in the description, add in these pieces of information:
- Why did you choose this location?
What two significant cultural pieces (i.e. language, art, history, etc,) that you can see in the “Street View” area of Google Maps at this location?
Resources
- Video introduction on how to create a map: https://www.youtube.com/watch?v=TKvBAwreA7A
- Video on Street View Use: https://www.youtube.com/watch?v=3g3NoY5B0wM
About the Author
My name is Emily Lahr. I have been teaching for seven years as a member of the faculty at Greene Central High School and I am now transitioning into the role of STEM Education Coach. I am from a small eastern North Carolina town called Havelock. I graduated from East Carolina University with my Bachelor’s Degree in Biology, a Master’s Degree in Science Education, and I’m currently finishing my PhD in Curriculum and Instruction. At GCHS I taught STEM Earth and Environmental Science, STEM Biology, AP Environmental Science, and Student Science Research. I am a member of the National Science Teacher Association, American Educational Research Association and am the Varsity volleyball coach. I am also a Science Leadership Fellow and Kenan Fellow! Along with this, I serve as a member working on USAEOP student research and also sit on the National Junior Science and Humanities Symposium Regional Director’s Advisory Committee Board as the Teacher Advisor. All of these experiences have shaped me to support scholars in the classroom.
Kenan Fellow Year 2022-2023
About the Fellowship
My Kenan Fellowship was a part of the partnership with STEM East and Burroughs Wellcome Fund (BWF). My mentors Mr. Bruce Middleton (STEM East) and Mr. Alfred Mays (BWF), both looked to build a beneficial, diverse, equitable and inclusive map of STEM organizations and individuals in eastern North Carolina. As a result of this, I felt it was important to not only provide students with a way to gain skills from engaging in map building, but also create a unique application for the use of Google Maps. Google maps is a program that many of us take advantage of on a daily basis but we have never dug much deeper than putting in our address or travel location; however, it can be used for so much more. As a result, I created this lesson to allow teachers to provide an activity which blends travel, exploration and science standards as well as an open-ended application of this lesson for a more brain break style activity or a way to learn about the culture of various locations.
Print this lesson
You can download and print a copy of this lesson here.